The Bondo Workflow
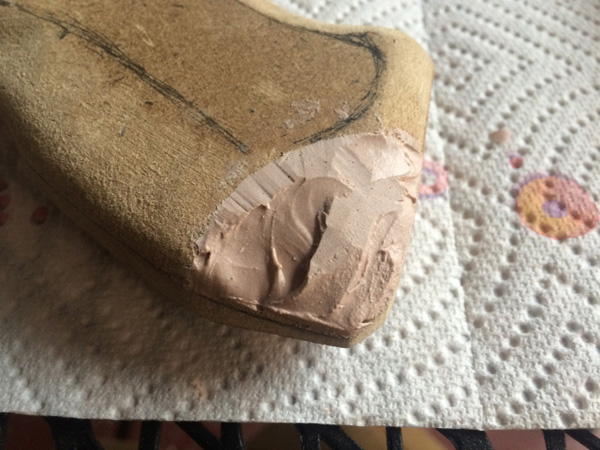
As you can see, there isn’t much in the way of updates on the BR85HB, though that’s not due to a lack of progress- in fact, it’s almost complete and ready for moulding, just a couple weeks of work left to do:

The night of “completion” after ten hours of straight work. Slightly loopy from exhaustion!
If you want to see how that’s been coming along, check out the 405th update thread here: http://www.405th.com/f21/halo-4-br85hb-sr-pic-heavy-first-major-project-43577/. Major recent updates are around pages 4/5/6. The lack of blog updates is primarily due to the fact that building a piece like this mostly consists of doing the same general things over and over again but in slightly different shapes, not exactly a grand learning experience on every part like I’d originally anticipated.
Anyway, that’s not what I want to write about today, as you may have inferred from the title.
Bondo-age!
Needless to say, over the course of this build, I’ve learned rather a lot about the use of Bondo body filler. It’s an incredibly useful material, and unsurprisingly a staple in the prop and cosplay maker’s arsenal. I’ve seen the question of how it’s used come up numerous times over the last few months, and since the specifics are usually glossed over in favour of general advice, and I’m now in a position to be able to offer a fairly comprehensive beginners’ guide, it seems right to do so and pay it forward.
So, here we go with my typical Bondo workflow, going from bare surface to the beginning of surface prep for finishing.
General requirements: Bondo (obv), workpiece (obv), Bondo glazing putty, mixing surface (I use yoghurt/dip lids) and associated mixing tools, respirator, nitrile gloves, assorted files, wire brush for cleaning out the files, 60 grit emery cloth, wet’n’dry paper from 220 grit upwards, sharp knife, sanding blocks, etc.

Some of the various bits and pieces.
Work above 50F, preferably around 70-80F (ie. “room temperature”). Make sure you have an applicator that has a flat edge. Multiple applicators of various sizes are handy, I use around 1/8” to about 1.5”. The spatulas designed for auto body repair aren’t very useful for modelling work since they’re huge, so I cut my own from 0.060” sheet styrene. It wears out under chemical attack from the resin after a while, but lasts a good amount of time- several months- and can be cut into custom shapes for specific jobs, as well as being pretty cheap on eBay. Plus the styrene can be used on builds itself. Win-win!

Putty spatulas, filler spatulas, mixer, “measurers”…
Wear a respirator at all times! When the container is open, during mixing and application, and during shaping. The former needs an organic vapour cartridge, the latter a particulate cartridge. Usually the all-purpose cartridges the MSA/3M respirators come with can do both plus ammonia/amines and some other solvents (magenta/olive NIOSH labelling in the US). Definitely worth the 30 bucks. You should also wear nitrile gloves since the hardener is pretty nasty, though I’m frequently guilty of not doing this.

Keeping gloves on the radiator in my office makes them last me about 3 days.
Put the lid back on the container! If you don’t keep up with this, after a couple months of being left off for hours at a time, the solvents will vaporise out (that is what you’re wearing the respirator for, after all) and you’ll end up with a very dry, thick “resin”. This isn’t necessarily a bad thing, depending on what you’re using it for, but it does require more force and more rigid tools to use, and doesn’t like to self-level as much as Bondo naturally tends to.

Yeah… It’s not supposed to look like the stuff on the right.
That’s the warnings out of the way, let’s look at the process:
1) Bondo’s pretty lax with mix ratios. You’re aiming for about 2-5% hardener, which is a pastel salmon colour.

Approximately the right colour. This is relatively a “large amount”.
You can use up to 50:50, but then it’ll be very rubbery and a terrible waste of hardener. Sometimes you want that rubbery though because it’s easy to carve with a knife once it’s cured, but only on very small details.

What happens when the hardener is further up the tube than you thought. But it can be helpful
2) First mix up a small batch and scrape it thinly over your current section of work area (probably no more than a 4” square at a time) ; the action of spreading forces the resin into any pores (porous materials) or scratches (roughed up non-porous materials) in the material and provides a well-bonded surface to begin with.

Nice rough 60 grit surfaces off the disc sander. I’ll drag some emery cloth over sealed MDF and plastic surfaces before the skim coat.
3) Once it goes bitty and crumbly and doesn’t really want to stick, stop trying to spread it. It’ll just crumble back off so it’s a waste of time. The only time you can use this stuff is for literal hole-filling of 1/4”+ diameter, 1/2”+ depth holes or channels, where you’ll be coming back with another layer to seal it in.

When it looks like this on the mixing surface, ball it up and toss it, it’s useless.
4) Once it sets up and goes rubbery (generally 3-6 minutes from mixing depending on hardener ratio, temperature and layer thickness), trim off any excess with an Xacto. Don’t worry about the little peaks and troughs on your surface, they’ll provide mechanical grip.

The scrape coat is pretty rough, no need to get pretty with it.
5) Start measuring out your main quantity of Bondo. You’re aiming for about a 1/4” maximum thickness over your work area section, typically, though some uses you can get away with really glopping it on. If you’re filling in an area with walls, you can use the walls as rails to set the height with the scraper.

Note that I’m not trying to fill every gap along the full length of both sides. Keep it manageable.
6) Now comes the most important part. First cut your Bondo to size. An Xacto is fine for small details, for bigger stuff you’ll need a boxcutter or snap-off utility knife. You can also sculpt it right now, which is good for making bevels and other hard-edge geometry. Sculpting smooth surfaces is a waste of time and blade sharpness, just ignore that for now. You have about 5-10 minutes of sculpting time, a little more if you’re using a stronger knife!
Trimming is usually “to fit”, but you can sculpt too.
7) After 30 minutes or so it’ll have finished the bulk of the curing and it’ll be hard, no longer rubbery. Careful, since now it’s also quite brittle. Now you need a coarse file or fine rasp. Don’t press very hard at first, just knock down the lumps and bumps until you get a feel for how much material it’s taking off (a lot!). Once you get the hang of it, you can go to town on it and eliminate huge sections of overfill or shape erratic blobs into gorgeous smooth curves. Remember not to use a “sawing” motion with the file on curves; get your hand and wrist curving with it it to ensure no flats (which are a pain to fill back out). You can also use 60 grit emery cloth to magnificent effect here.

The rough half round file in the cheap assorted pack will make quick work of cured Bondo.
8) Take a medium file or some 220 sandpaper over it now to smooth out the planes you have. For fine details, use needle files. Once you’ve done this, you can see all the shiny little pits and voids from air bubbles that are inherent to the process.

Once it’s somewhat smooth, you can more easily see what’s missing.
9) Mix up a batch similar to your first skim coat, and scrape/smooth it over your surface. Pay attention to all the voids that you previously saw, and try to fill them all in without adding too much bulk to the surface you just so carefully sculpted.
10) Don’t bother with the trimming this time, except in cases of overhang. Trying to carve your skim coat will most likely just result in you ripping it up and having to start again. Just wait for it to harden up completely (maybe an hour) and work on something else or a different section for now.

Here’s a before and after. The large patches of void are quite obvious here
11) Grab your coarse file and knock down all the lumps and bumps of the skim coat, then true it all up and blend it together with your medium grit. You should, in theory, have a pretty close to perfect surface now, though sometimes this last skim coat needs doing twice. Patience is rewarded in this process.

A quick thin scrape coat using the surface itself as a depth gauge sorts it out in no time.
12) Once you’re happy with the surface, sand it thoroughly to 320 grit. This will start to put a slight sheen on it, and grind through any minor dimples you might have missed. It’ll also, once you’ve blown all the dust away, reveal any pin holes that need filling before you can proceed to surface prep and finishing.
13) Grab a nitrile glove and small popsicle stick broken in half or something (I use MDF scraps off the floor). Fill the pin holes with Bondo air-drying Glazing and Spot putty (or a similar glazing putty, there are plenty out there). Now use your finger and the little tool to smear and dab tiny amounts of putty into the pin holes.

Once the Bondo is approaching done, I like to use automotive primer to see where it’s going wrong. One flat colour shows imperfections more clearly.
14) Sand any little lumps of putty down with the 320 grit sandpaper. Once your entire helmet/gun/plate/whatever is to this stage, you can probably wet sand the whole thing at this point.

Then once it’s done and you’ve re-primed it and wet sanded it down, it looks vaguely like this!
Now you’re ready to either continue up the grits, wet sanding as you go (I’d recommend at least 400 grit before painting), or lay down some filler primer and see how you’re looking. That next part is up to you. If you want some visual cues, there’s a whole bunch of this stuff at various stages in my BR85 build thread. Not a helmet, but Bondo looks the same.
So, there you have it; the basic Bondo technique that’s probably at least 80% similar to 99% of the people out there who use it for modelling purposes. It works for me, at least. I was originally considering doing a video for this; it seems like it might still be worth doing. If that’s something you’d like to see, let me know in the comments or on Twitter or something as you usually do.
At some point later in the year [Editor’s note: In several years, clearly], when I have more pictures of the substructure stages and more advanced techniques and have used more of the Bondo products (Bondo hair, Bondo glass… Possibly also non-3M “polyester resin fillers”) and have experimented with hacks (eg. Rondo) and shortcuts (buying your own chopped fibreglass, for example), I’m planning on putting it all together into an eBook, which seem to be a popular option for condensed repositories of information in the maker world these days.
Hope this was useful!
~Rob